Thursday, 14 November 2013

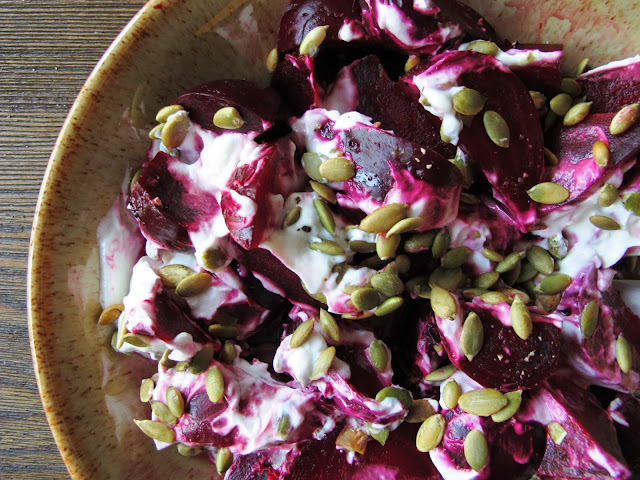
ROASTED BEETS WITH CREAMY GOAT CHEESE AND TOASTED SEEDS.


Roasted Beets with Creamy Goat Cheese and Toasted Seeds.

Beets are like candy.  Deliciously sweet, leaking juicy red colour, and easy to gobble down, beets are nature's best treat. Roasting brings out that sweet flavour even more, creating a tender, juicy bulb that is hard to call a vegetable.  But vegetable it is, and when it's in season I just can't get enough.  Especially when it's paired with a nice soft cheese and crunchy, browned pumpkin seeds.

Beetroot is not the most attractive plant out there.  It comes out of the ground with stubborn dirt clinging to its brown coloured beets and tough looking stalks.  It's an unfriendly looking vegetable.  But get inside those rough brown skins, and you'll find one of the brightest colours in nature, and an incredibly smooth, almost buttery texture.  Like your mom used to tell you, don't judge a book by its cover.

Roasted Beets with Creamy Goat Cheese and Toasted Seeds.

Also, don't throw out the baby with the bathwater.  Well, I'm not sure my mom ever said that one, but you catch my drift.  It's hard not to let the beets steal the show at this veggie parade, but those green stalks are actually worth some of your time too. Treat them just like you would another hearty green like kale or swiss chard and saute in a little olive oil and garlic, or throw them into a salad or soup.

Beets are also amazing nutrition wise.  They are known to have excellent antioxidants, fight inflammation in the body, high in folate and potassium, and despite their addictive sweetness, they are still low in calories.  You can also find beets in a pale golden yellow colour too.  These have a beautiful light, mild flavour and are amazing grated into salads, or just cut in slices to nibble on raw.

Roasted Beets with Creamy Goat Cheese and Toasted Seeds.

Roasted Beets with Creamy Goat Cheese and Toasted Seeds
8-10 large fresh beets
1/2 cup goat cheese
1/4 cup 0% plain greek yogurt
1/4 cup raw, unsalted pumpkin seeds
Coarse sea salt & fresh cracked pepper

To roast the beets, preheat the oven to 400 degrees and start by chopping off the stems and the tails, but leaving the skins on. Wash the beets thoroughly, and without drying them, place them in a double layer foil packet, sealing tightly at the top.  You may need to make two or three packets to hold all your beets.  Place the foil packets on a baking sheet and roast for about one hour.  The time will depend on the size of your beets, but you'll know they are ready when you can easily pierce the beets with a fork.  Let the beets cool until they are easy to handle, then use your fingers to slide the skins right off.

While the beets are cooling, spread the pumpkin seeds out on a baking sheet and toast them in the oven for about 5 minutes. Watch these carefully, as they will burn quickly.

Using a hand blender or a food processor blend together the goat cheese and yogurt until smooth and creamy.  Slice the cooled and skinned beets into halves or quarters, depending on their size.

On a serving plate, spread out the beets on the bottom.  Scatter dollops of the cheese and yogurt mixture over the beets. Sprinkle the pumpkin seeds on top.  Season with salt and pepper generously, as this will bring out all the flavours in the dish. Serve as is for a clean look, or give it one or two stirs to swirl the beet juices in with the cheese and create a bright pink colour.

Tuesday, 12 November 2013

BAKED MEXICAN SQUASH STEW. AN UNEXPECTED FIESTA.

Baked Mexican Squash Stew

I'm buying up spaghetti squash like there is no tomorrow.  I've found the best ones are always the really big ones.  Total coincidence, I swear.  Once roasted, and removed from the skin with a fork (see how in this post), I'm left with an enormous bowl of spaghetti like strings of squash.  So I keep coming up with different ways to eat it.

This recipe is my new favourite.  It's quick to throw together, and it's two main ingredients are squash and beans so I feel great about eating it.  It has a strong mexican flavour to it, and although it may not look super appetizing, it is actually really really good.  I couldn't stop eating it.  I was trying to photograph it, and I would pick up a stew laden chip to move it over to another spot, only to find that it had landed in my mouth and I was chewing and swallowing.  Seriously.  That has to be good right?

Baked Mexican Squash Stew

I do love mexican food.  It always has so much flavour and punch, and makes you feel like you are getting the best meal of your life.  Mexican cuisine is great at using fresh ingredients like ripe red tomatoes and serving it up in a way that is anything but boring.  I love the use of herbs and chili's in mexi dishes, it's nice to have flavour and heat without needing to dunk your whole head in a bucket of water.  Besides, it's often naturally gluten free, since traditional mexican cooking relies on more corn than it does wheat.

Despite my passion for mexican, I found that I don't really incorporate it much into my home cooked meals.  Now this is something that needs to be remedied.  Hence, this mexican inspired squash dish.  I wanted the squash to act as the "pasta" if you will, and the beans to become the main protein.  The enchilada sauce, cilantro, and jalapeno give it that mexican flair, and the grated cheese brings it all together in the oven.  While it's cooking, this dish really comes together.  The beans become so soft and tender, that when you take a bite you get that baked or refried bean flavour which mixes perfectly with the green enchilada sauce which is made of chilies, tomatoes, peppers and spices.

Baked Mexican Squash Stew

I served this up with a plate of organic corn chips, which was a really good idea if I do say so myself.  The chips are a great carrier, and give a bit of crunch to each bite.  However, you can totally just eat this by itself too.  It's pretty delicious either way.

Baked Mexican Squash Stew (Family Size)
6 cups roasted and shredded spaghetti squash
2 19oz cans of mixed beans, drained and rinsed
1 1/2 cups grated cheddar cheese, plus extra to top
1 cup enchilada sauce
1/2 cup chopped fresh cilantro
1 fresh jalapeno pepper, seeded and finely diced

Combine all ingredients in a large bowl, then pour into a casserole dish.  Top with extra grated cheese, and cover with aluminum foil.  Bake at 400 degrees for about one hour.  Remove the foil and broil for 10 minutes to brown the top.  Serve with tortilla chips or crusty bread.

Friday, 8 November 2013

RAW KALE FETA & ARTICHOKE DIP. DIP, DIP AWAY!


Raw Kale Feta & Artichoke Dip

I'm trying to expand my hummus horizons.  In the dip world, it's hard to beat.  When you are looking for something healthy and satisfying you can sometimes feel as if your options are limited.  That's why I like this fresh dip.  There's lots of good stuff packed in like kale, greek yogurt and artichokes, but it's also deliciously creamy with a good kick of flavour from the feta cheese.  It's kind of like eating your vegetables, on your vegetables.

Raw Kale, Feta & Artichoke Dip
1/2 cup 0% plain greek yogurt
1/2 cup chopped kale
1/2 cup low fat feta packed in brine (add a splash of the brine as well)
14oz can of whole artichoke hearts (about 8-10 hearts)
1 clove of garlic, minced

Blend everything together until smooth.  If desired, hold back some chopped cheese and artichoke to mix in for a chunkier dip.

Wednesday, 6 November 2013

CHOCOLATE COCONUT TOFU MOUSSE. YOU'D NEVER KNOW IT'S TOFU.

 
Chocolate Coconut Tofu Mousse

 This dessert was inspired by Whole Foods.  I am always completely taken aback by the amount and variety of prepared foods at Whole Foods.  It's amazing!  If you need a quick dinner, this is the place to go.  Their self serve buffet bar has everything from fresh cooked salmon, to dozens of whole grain salads, to an entire row dedicated to nachos.  Yes, nachos!  Chips, cheese, any topping you could want, it's all here.  Honestly, I get a little intimidated by all of the choices and then end up choosing something small from the refrigerated section because I just don't trust myself at the buffet bar.

The other day, I was hungry for dinner but feeling a bit limited by the lack of substantial gluten free options.  So I grabbed a small salad and a chocolate tofu dessert from Whole Foods, figuring that it would do the trick.  Not only did it solve dinner for that night, but it inspired me to recreate that sweet, rich, chocolatey dessert at home as well.

Chocolate Coconut Tofu Mousse

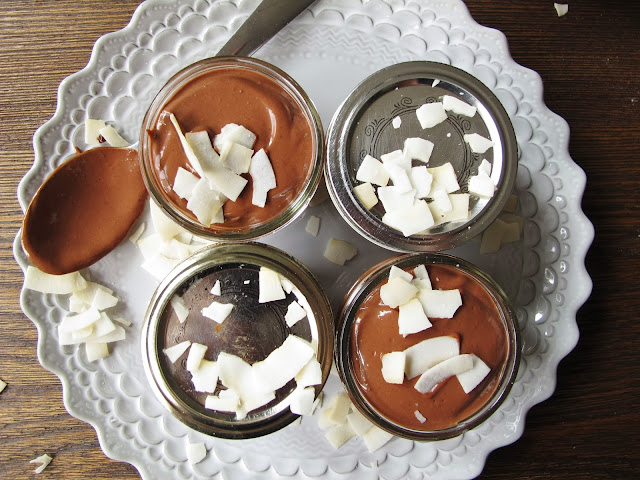
Huge success.  I just loved these little bowls chocolate mousse, because they taste so smooth and decadent that you would never even know it's tofu.  It's a great option after a light dinner, since it's a bit filling itself.  I also serves very well as a make ahead dessert as it needs to be chilled, so you can literally just pull it out of the fridge.  And if you already have it in cute little dishes (or rustic mason jars) then there is no serving required either.

Chocolate Coconut Tofu Mousse

The ingredients for this Chocolate Coconut Tofu Mousse are simple, but important.  The main ingredient is tofu, but it is crucial that this be silken tofu.  You can find it easily at the grocery store, but just make sure you are choosing that silken option.  The chocolate I used was semi sweet chips, but this would also be very nice with a rich dark chocolate.  Finally, the coconut butter!  This was the first recipe that I put my recent Coconut Butter recipe to use in, and I'm so glad I did.  It added a wonderful layer to the chocolate flavour and coconut is always a pretty garnish.

Chocolate Coconut Tofu Mousse

Chocolate Coconut Tofu Mousse
1 530g package of silken firm tofu
1 cup semi sweet chocolate chips (or try dark chocolate for a luxe version)
2 tablespoons agave syrup
2 tablespoons coconut butter

Melt the chocolate in a pot or double boiler over low heat, stirring constantly until smooth.  Add all the ingredients, including the melted chocolate, to a food processor and blend until incorporated.  Strain through a fine mesh sieve, pushing through with a large spoon when necessary.  Pour the mixture into individual serving dishes and chill for at least 1 hour.  Top with coconut flakes or chocolate shavings if desired and serve.